
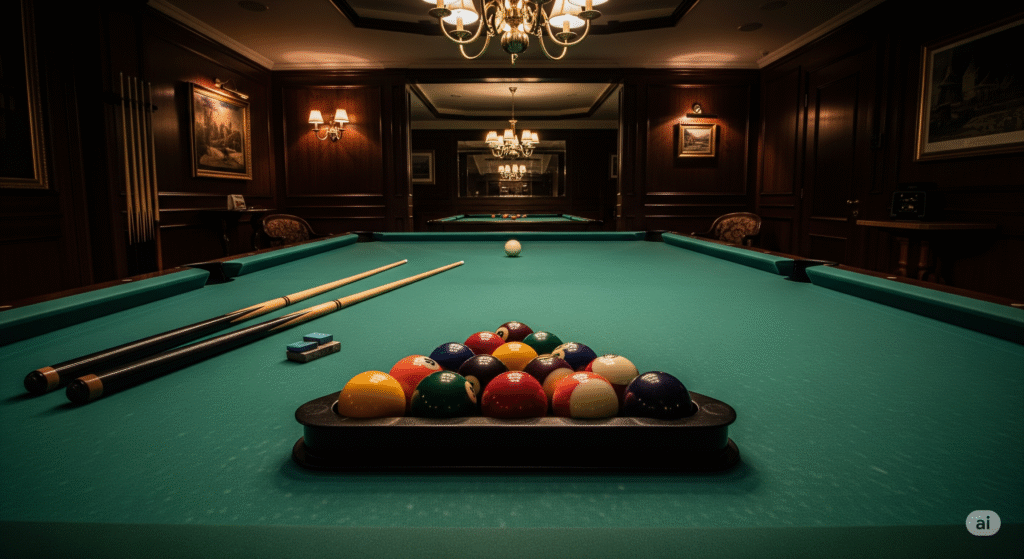
“The first time I saw a pool table at my uncle’s house, it looked perfect — shiny green felt, polished cues, and a light hanging right above. Years later, when I bought my own, I realized it doesn’t magically come ready like that. Pool table setup is an art: levelling, spacing, and getting everything balanced. Once I set it up properly, the game finally felt like those childhood memories — smooth, fair, and fun.”
Why Setting Up a Pool Table Correctly Is Important
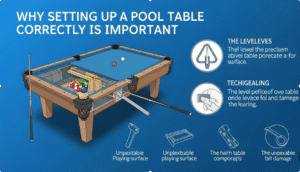
Hello reader, A pool table is a precise game surface that requires the proper setting, making it more than simply another piece of furniture. Unlevel surfaces, balls that veer off course & unending frustration can result from poor setup. The smooth roll, straight shots and general contentment that make every game pleasurable are provided by a properly constructed pool table.
Selecting the Perfect Site
Hi Reader, First things first: choose the ideal location! The space you select needs to be large enough to fit the pool table as well as players’ comfort and the ability to cue from all directions. Here’s something to think about:
- Room Dimensions: Typical pool tables are 7 feet, 8 feet, and 9 feet in length. Generally speaking, you need at least five feet of space on all sides. For instance, the space should be at least 13 by 17 feet if you have an 8-foot table that is 4 feet wide by 8 feet long.
- Lighting: Proper lighting from above is crucial. In order to reduce shadows and facilitate aiming, many pool players install a special pool table light.
- Flooring: A hard, level surface is best. Carpet is OK, although it may need to be leveled more frequently.
Setting Up and Unpacking Your Table
Examine every component of your table carefully when it comes. The frame, legs, slate pieces, felt, rails and pockets are the main components of most billiard tables. First, place the frame in the desired permanent location for the table. The weight makes moving it quite difficult once you start building.
Putting the Legs and Frame Together
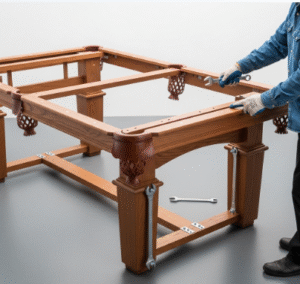
- Put the frame: together by carefully following the manufacturer’s directions. Securely tighten nuts without going overboard, as this might cause wood components to break.
- attach the legs: Verify that the legs are securely fastened. Verify again that the frame is level and square.
Setting Up the Slate
Your pool table’s slate is its fundamental component. For accuracy, high-quality tables employ a three-piece slate. To install it, follow these steps:
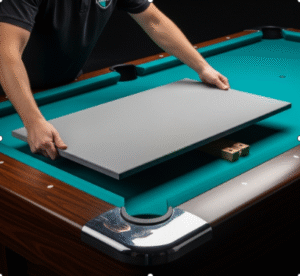
- Slate Piece Positioning: Gently place each piece on the frame. Help is needed since the slate is quite heavy!
- Level Every Piece: Make use of a carpenter’s or, ideally, a machinist’s level. To ensure that the surface is completely level, shim as necessary.
- Seal the Seams: To close the spaces between slate pieces, apply seam filler or beeswax. This guarantees a level playing field.
Using the Felt
It’s an art to stretch the felt (cloth). This is where a lot of do-it-yourself installs go wrong.

- align the cloth: by smoothing the felt over the slate.
- Glue or staple: Work outward from the center. To avoid creases or bubbles, pull the felt evenly yet tightly.
- Cut Pocket Holes: Cut around the pocket holes with care.
Connecting Pockets and Rails
Attach the rails once the felt is fastened. Make certain that the cushions are snug and flush. Securely fasten the pockets. Many tables come with drop pockets or ball return mechanisms; be sure you follow the directions for your particular table.
Last Leveling
Examine the entire playing field one again before you play. A cue ball should be placed at different spots; if it rolls by itself, the leveling has to be changed. Shims beneath the legs can be added or removed to make minor modifications.
Including Final Details
To preserve your floor and improve the appearance of your game room, think about putting a rug below. Directly above the table, between 32 and 36 inches above the felt, provide adequate lighting. Keep chalk and cue racks close at hand.
Tips for Maintaining Your Pool Table
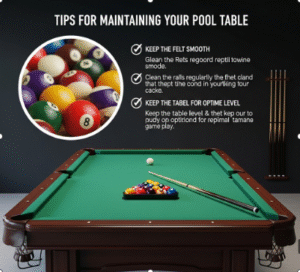
- Clean Often: After each session, clean the rails and brush your felt.
- Manage the surroundings: Maintain a consistent humidity and temperature in your game room. Slate or wood can get warped by drastic alterations.
- Verify Level: After relocating the table or every few months, re-level it.
Concluding remarks
It takes time, accuracy & a little bit of strength to set up a pool table but the effort is worthwhile! You may have a flawlessly level table that is ready for a tournament at home if you follow my advice. Bring your pals over, rack up the balls and have a great time for hours.
Read more: Norton.com setup ❤️
FAQ’S:
How much of a space is required for a pool table?
Aim for five feet of space on all sides of your table. You'll need around 13 feet by 17 feet for an 8-foot table.
Does setting up a pool table need experts?
It's strongly advised for slate tables, though not always. They require careful leveling and are weighty.
How is a pool table leveled?
Make use of a machinist's or carpenter's level. Shims beneath the legs may be added or removed to provide the ideal level table.
How can I keep my pool table safe?
Keep food and beverages away, brush the felt frequently, and wear a cover when not playing.
After setting up, is it possible to relocate my pool table?
Don't drag it! To avoid breaking the slate or frame, disassemble it first.
How should a pool table be lit?
To ensure shadow-free play, use a special overhead light 32 to 36 inches above the felt.
What is the average setup time for a pool table?
Depending on experience and table style, 2 to 5 hours with assistance.
What is a pool table's slate?
smooth ball roll is ensured by the flat, massive stone surface beneath the felt.
Should my pool table have a mat below it?
Although optional, it lessens noise and protects flooring.
How frequently should I check the level of my pool table?
Whenever you feel like things are falling apart, or every few months.

